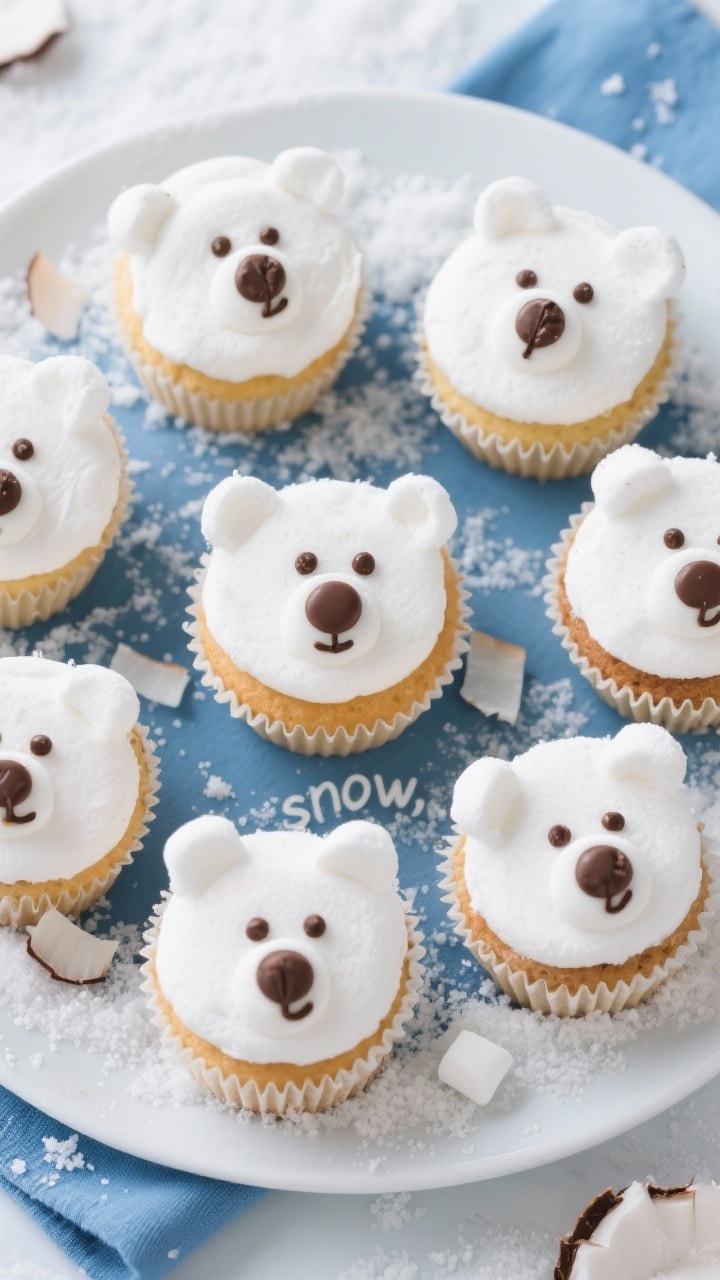
Polar Bear Cupcakes are the kind of treat that makes everyone smile before they even take a bite. They’re adorable, fluffy, and surprisingly easy to assemble, even if you’re not a decorating pro. Under the cozy fur of coconut and frosting, you’ll find a tender vanilla cupcake with a creamy buttercream swirl.
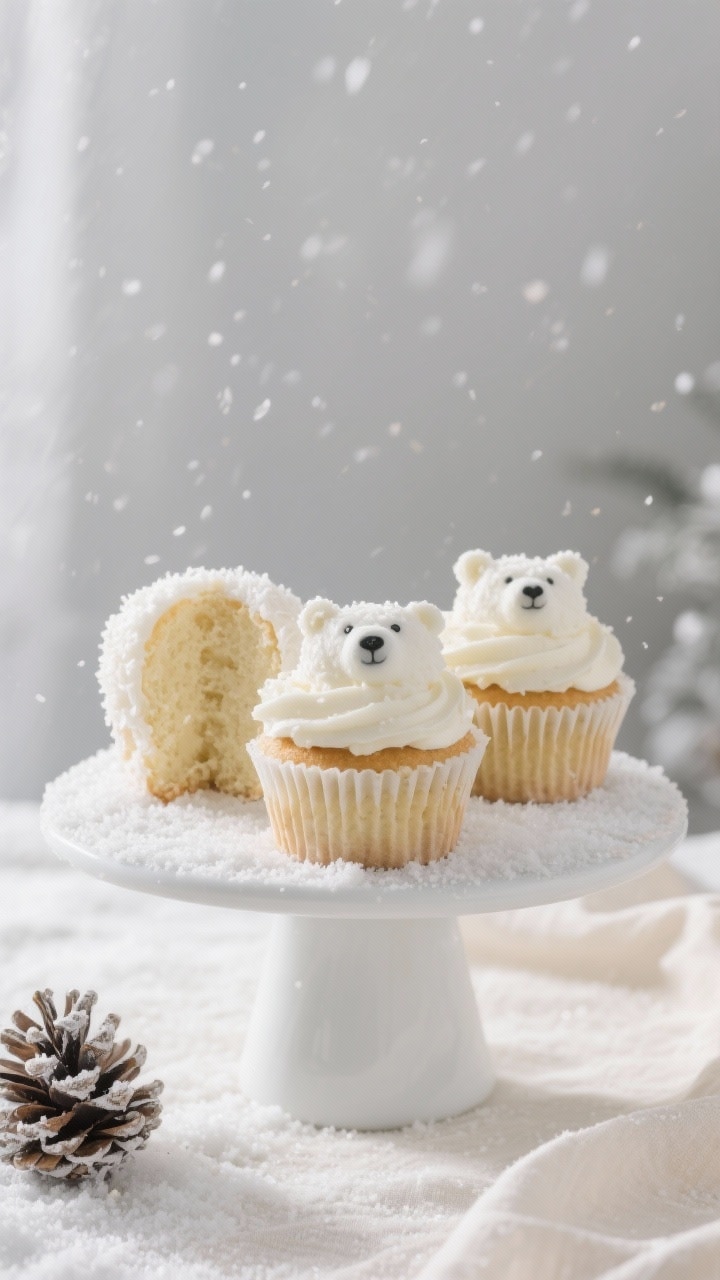
These make great classroom treats, holiday party desserts, or a fun baking project with kids. You’ll get charm, flavor, and a little winter magic in every bite.
Table of Contents
Why This Recipe Works

These cupcakes rely on simple techniques and pantry ingredients, so you won’t need any fancy tools. Shredded coconut creates that “polar bear fur” look with minimal effort, and marshmallows make the ears and muzzle pop.
A smooth vanilla buttercream acts as both frosting and edible glue, keeping everything in place. The flavors are balanced: not too sweet, with a soft crumb that holds up well under the decorations.
Shopping List
- For the cupcakes:
- 1 1/2 cups all-purpose flour
- 1 cup granulated sugar
- 1 1/2 teaspoons baking powder
- 1/4 teaspoon baking soda
- 1/2 teaspoon fine salt
- 1/2 cup unsalted butter, melted and slightly cooled
- 2 large eggs, room temperature
- 1/2 cup whole milk, room temperature
- 1/4 cup sour cream or plain yogurt
- 2 teaspoons vanilla extract
- For the frosting and decoration:
- 1 cup (2 sticks) unsalted butter, room temperature
- 3–3 1/2 cups powdered sugar, sifted
- 1–2 tablespoons heavy cream or milk
- 1 teaspoon vanilla extract
- Pinch of salt
- 2–3 cups sweetened shredded coconut
- Large marshmallows (for muzzles)
- Mini marshmallows (for ears)
- Mini chocolate chips or chocolate pearls (for eyes)
- Brown or black candy-coated chocolates, chocolate-covered raisins, or chocolate chips (for noses)
- Optional: black gel icing for tiny details
- Optional: white sanding sugar for extra sparkle
Step-by-Step Instructions
- Prep the pan and oven. Line a 12-cup muffin tin with paper liners. Preheat the oven to 350°F (175°C).
- Mix the dry ingredients. In a large bowl, whisk together flour, sugar, baking powder, baking soda, and salt until evenly combined.
- Whisk the wet ingredients. In a separate bowl, whisk melted butter, eggs, milk, sour cream, and vanilla until smooth.
- Combine the batter. Pour the wet ingredients into the dry and whisk or stir just until no dry streaks remain.
Do not overmix. The batter should be thick but pourable.
- Fill and bake. Divide batter among the liners, filling each about two-thirds full. Bake for 18–22 minutes, or until a toothpick comes out clean and the tops spring back.
Cool in the pan for 5 minutes, then transfer to a rack to cool completely.
- Make the frosting. In a mixing bowl, beat butter on medium speed until creamy, 2 minutes. Add powdered sugar in 2–3 additions, alternating with a splash of cream, and beat until fluffy, 3–4 minutes. Mix in vanilla and a pinch of salt.
Adjust consistency with more cream or sugar as needed.
- Prep decorations. Pour shredded coconut into a shallow bowl. Cut large marshmallows crosswise into thirds for muzzles; you’ll use the neat round middle slices. For ears, cut mini marshmallows in half diagonally to create flat bases that stick well.
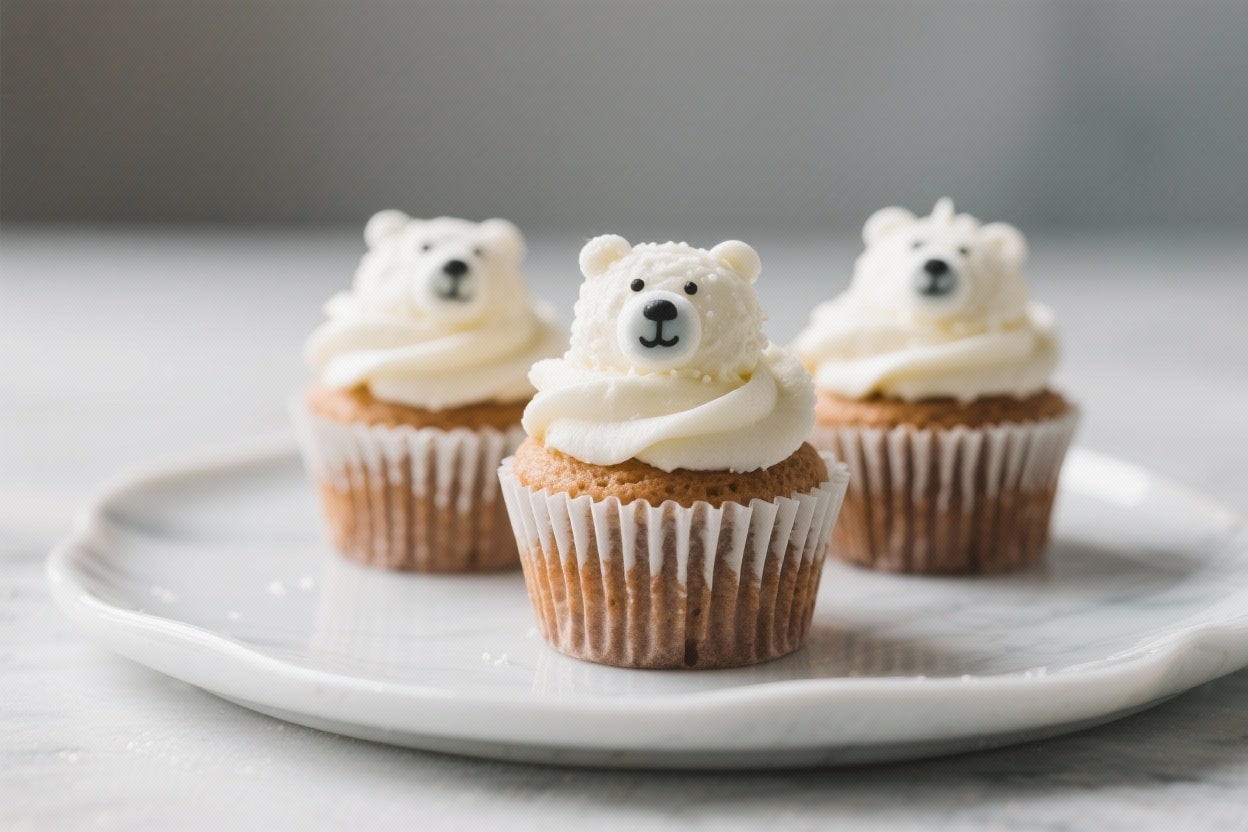
- Frost the cupcakes. Spread or pipe a generous layer of frosting on each cooled cupcake.
Keep it slightly domed to help the “fur” stick.
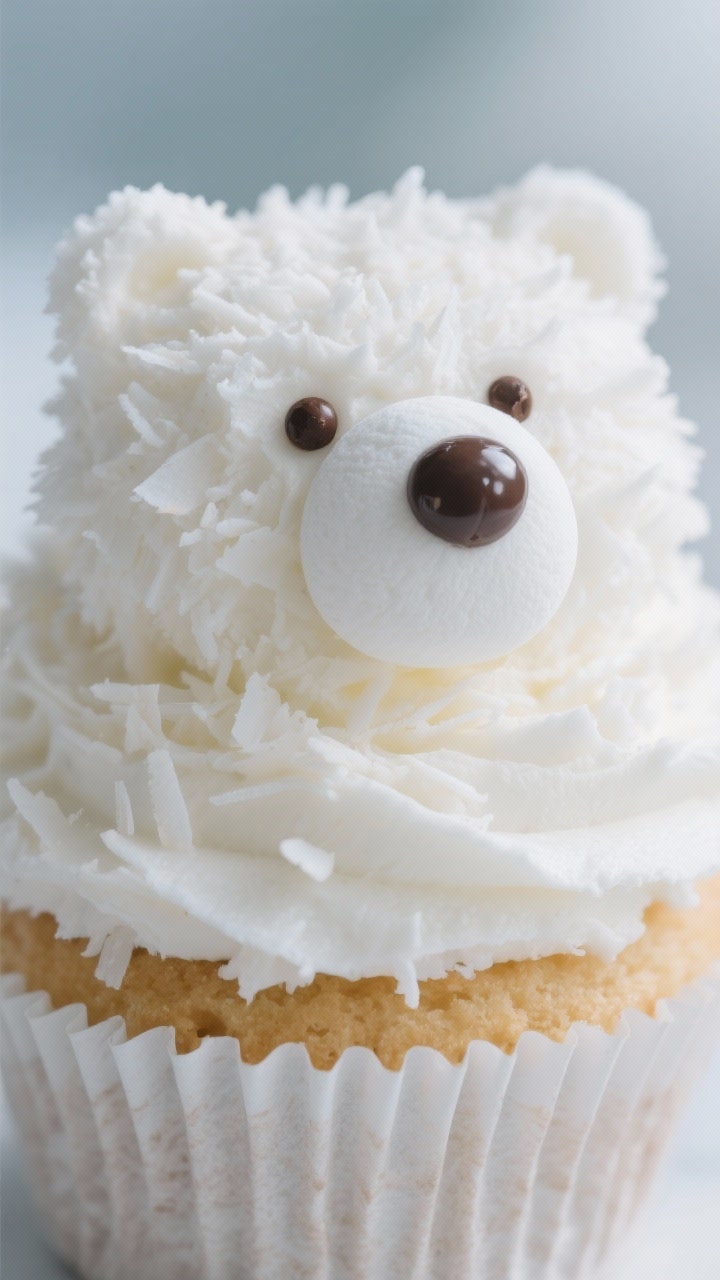
- Add the fur. Press each frosted cupcake, frosting side down, into the coconut. Rotate gently to coat. Press extra coconut onto any bare spots.
For a snowy sparkle, sprinkle with sanding sugar.
- Create the muzzle. Place a large marshmallow slice slightly low on the cupcake front, pressing into the frosting. Add a dollop of frosting on the muzzle and attach the nose candy.
- Finish the face. Press two mini chocolate chips above the muzzle for eyes (pointy side down looks nicer). Add two mini marshmallow halves near the top for ears.
Use gel icing to add tiny dots or a mouth if you like.
- Set and serve. Chill the decorated cupcakes for 10–15 minutes to help everything set. Serve at cool room temperature.
Storage Instructions
Room temperature: Store undecorated cupcakes in an airtight container for up to 2 days. Once decorated, they’re best the same day, but will keep 24 hours at cool room temperature.
Refrigeration: For longer storage, refrigerate decorated cupcakes in a covered container for up to 3 days.
Let them sit out 20–30 minutes before serving so the frosting softens.
Freezing: Freeze undecorated cupcakes, well wrapped, for up to 2 months. Thaw at room temperature, then frost and decorate. Avoid freezing decorated cupcakes; the marshmallows can toughen and the coconut can get soggy.
Benefits of This Recipe
- Kid-friendly and hands-on: Simple decorating steps make this a great family project.
- Flexible ingredients: Pantry staples and easy swaps keep it low-stress.
- High visual impact: The coconut “fur” and marshmallow features create instant charm.
- Reliable texture: The sour cream adds moisture, so the cupcakes stay tender.
- Make-ahead friendly: Bake the cupcakes ahead and decorate the day you serve.
Pitfalls to Watch Out For
- Overmixing the batter: This can make cupcakes dense.
Mix just until combined.
- Decorating warm cupcakes: Warm cakes melt buttercream, so cool completely first.
- Too little frosting: The coconut won’t stick well. Use a generous layer.
- Heavy decorations slipping: Press pieces gently into frosting and chill briefly to set.
- Stale coconut: Use fresh, soft shredded coconut for the best look and texture.
Variations You Can Try
- Chocolate base: Swap 1/4 cup flour for cocoa powder for chocolate cupcakes.
- Peppermint twist: Add 1/2 teaspoon peppermint extract to the frosting and sprinkle with crushed candy canes.
- Cream cheese frosting: Use 8 ounces softened cream cheese beaten with 1/2 cup butter and 3–3 1/2 cups powdered sugar.
- Gluten-free: Substitute a 1:1 gluten-free baking flour blend; check labels on decorations.
- Dairy-free: Use plant-based butter and milk; choose vegan marshmallows and chocolate.
- Mini cupcakes: Bake 12–14 minutes; use tiny marshmallow bits and micro chips for faces.
- Blue eyes: Use blue candy pearls for a bright polar look.
FAQ
Can I use a boxed cake mix?
Yes. Prepare a vanilla or white cake mix as directed and bake as cupcakes.
The decorating steps remain the same, and the results are still adorable.
What if I don’t like coconut?
You can skip the coconut and use white sanding sugar or finely crushed vanilla cookies instead. The texture will be less fluffy but still cute and tasty.
How do I keep the marshmallows from getting sticky?
Cut them right before using and press into the frosting immediately. A quick 10-minute chill after decorating helps set them in place and keeps them tidy.
Can I make these the day before a party?
Absolutely.
Bake the cupcakes the day before and store them airtight at room temperature. Decorate the day of the event for the freshest look.
How can I make the cupcakes extra moist?
Don’t overbake, and keep the sour cream in the batter. You can also brush the tops with a light vanilla simple syrup if you want added moisture.
What piping tip should I use?
A large round or star tip works well, but you can also spread frosting with a spatula.
The coconut covers most texture, so don’t stress about perfect piping.
Can I color the frosting?
For polar bears, white frosting looks best, but you can tint a small amount light pink for ears or cheeks. Use gel color so you don’t thin the frosting.
How many cupcakes does this make?
About 12 standard cupcakes. If you need more, double the recipe and bake in batches.
What if I’m short on time?
Buy plain bakery cupcakes and decorate at home.
You’ll still get the fun polar bear faces with minimal effort.
How do I transport them safely?
Chill the cupcakes to set the decorations, then place them in a snug cupcake carrier. Drive carefully, and keep the box level and cool.
In Conclusion
Polar Bear Cupcakes bring playful charm and cozy flavor to any winter table. With simple ingredients and a few clever decorating tricks, you’ll have a batch that looks bakery-worthy without the stress.
Make them for a party, a snow day activity, or just because they’re fun. They’re cute, delicious, and sure to be a hit with kids and adults alike.
Ingredients
Instructions
- Prep the pan and oven. Line a 12-cup muffin tin with paper liners. Preheat the oven to 350°F (175°C).
- Mix the dry ingredients. In a large bowl, whisk together flour, sugar, baking powder, baking soda, and salt until evenly combined.
- Whisk the wet ingredients. In a separate bowl, whisk melted butter, eggs, milk, sour cream, and vanilla until smooth.
- Combine the batter. Pour the wet ingredients into the dry and whisk or stir just until no dry streaks remain. Do not overmix. The batter should be thick but pourable.
- Fill and bake. Divide batter among the liners, filling each about two-thirds full. Bake for 18–22 minutes, or until a toothpick comes out clean and the tops spring back. Cool in the pan for 5 minutes, then transfer to a rack to cool completely.
- Make the frosting. In a mixing bowl, beat butter on medium speed until creamy, 2 minutes. Add powdered sugar in 2–3 additions, alternating with a splash of cream, and beat until fluffy, 3–4 minutes. Mix in vanilla and a pinch of salt. Adjust consistency with more cream or sugar as needed.
- Prep decorations. Pour shredded coconut into a shallow bowl. Cut large marshmallows crosswise into thirds for muzzles; you’ll use the neat round middle slices. For ears, cut mini marshmallows in half diagonally to create flat bases that stick well.
- Frost the cupcakes. Spread or pipe a generous layer of frosting on each cooled cupcake. Keep it slightly domed to help the “fur” stick.
- Add the fur. Press each frosted cupcake, frosting side down, into the coconut. Rotate gently to coat. Press extra coconut onto any bare spots. For a snowy sparkle, sprinkle with sanding sugar.
- Create the muzzle. Place a large marshmallow slice slightly low on the cupcake front, pressing into the frosting. Add a dollop of frosting on the muzzle and attach the nose candy.
- Finish the face. Press two mini chocolate chips above the muzzle for eyes (pointy side down looks nicer). Add two mini marshmallow halves near the top for ears. Use gel icing to add tiny dots or a mouth if you like.
- Set and serve. Chill the decorated cupcakes for 10–15 minutes to help everything set. Serve at cool room temperature.