Ever wake up feeling heavy, bloated, or just off? I’ve been there and so have many of the women I cook and share wellness tips with. I’m Celia, and my love for healing foods started long before I became a full-time recipe creator.
After years in the holistic health space, I’ve come to rely on a few simple rituals that help reset the body naturally. One of my favorites? A Himalayan salt flush for weight loss.
This easy-to-make drink uses just pink salt and warm water, but the results can be surprisingly powerful. It’s a gentle way to nudge your system back into balance, ease digestion, and even help kickstart weight loss without extreme diets or complicated routines.
It reminds me a lot of the Brazilian Mounjaro recipe I often recommend for its metabolism-boosting properties, or the refreshing take featured in the Natural Mounjaro Recipe that so many of my readers enjoy as part of their daily wellness ritual.
Today, I’ll walk you through how to make this salt water flush, what to expect, and the five surprising benefits people often report after trying it.
- Supports digestion naturally
- Reduces bloating quickly
- Uses simple, real ingredients
- Great for women over 40 seeking balance
- Can be customized with lemon, ginger, or mint
- Not ideal for daily use
- May cause urgency plan time for it
- Taste can be strong for some (adjust with honey or ginger)
Table of Contents
Key Benefits: 5 Shocking Results of a Himalayan Salt Flush
You wouldn’t think something as simple as salt and water could have such a big impact but once you try it, you’ll see why people keep coming back to this cleanse.
Here’s what really happens when you start your day with a Himalayan salt flush for weight loss.
You Feel Lighter Almost Instantly
Within about an hour, that heavy, bloated feeling disappears. The warm salt water works through your digestive system quickly, helping to move everything out.
It’s not uncomfortable just a clean, refreshing release that leaves your belly feeling light.
Your Weight Drops (Even Overnight)
A lot of people notice they’re down a pound or two after the flush. It’s not body fat, but it is excess water and built-up waste. It’s one of those quick wins that helps you feel like you’re on the right track.
You Get a Boost of Energy
I know it sounds odd, but after doing the flush, many people say they feel more awake and clear-headed. It’s like your body has more room to function once it’s not bogged down.
Your Digestion Gets a Fresh Start
If you’ve been dealing with irregularity, this can be a game changer. The salt water helps gently move things along without harsh laxatives. For many, it resets digestion and helps things run more smoothly for days afterward.
You Notice Other Little Perks
After a few flushes, you might notice clearer skin, reduced puffiness, and even better sleep. When your gut’s in balance, everything else tends to follow and that’s the real beauty of this simple trick.
“Some of the best shifts I’ve felt didn’t come from big changes they started with something simple, like a glass of warm salt water and a few quiet minutes to myself.” – Celia
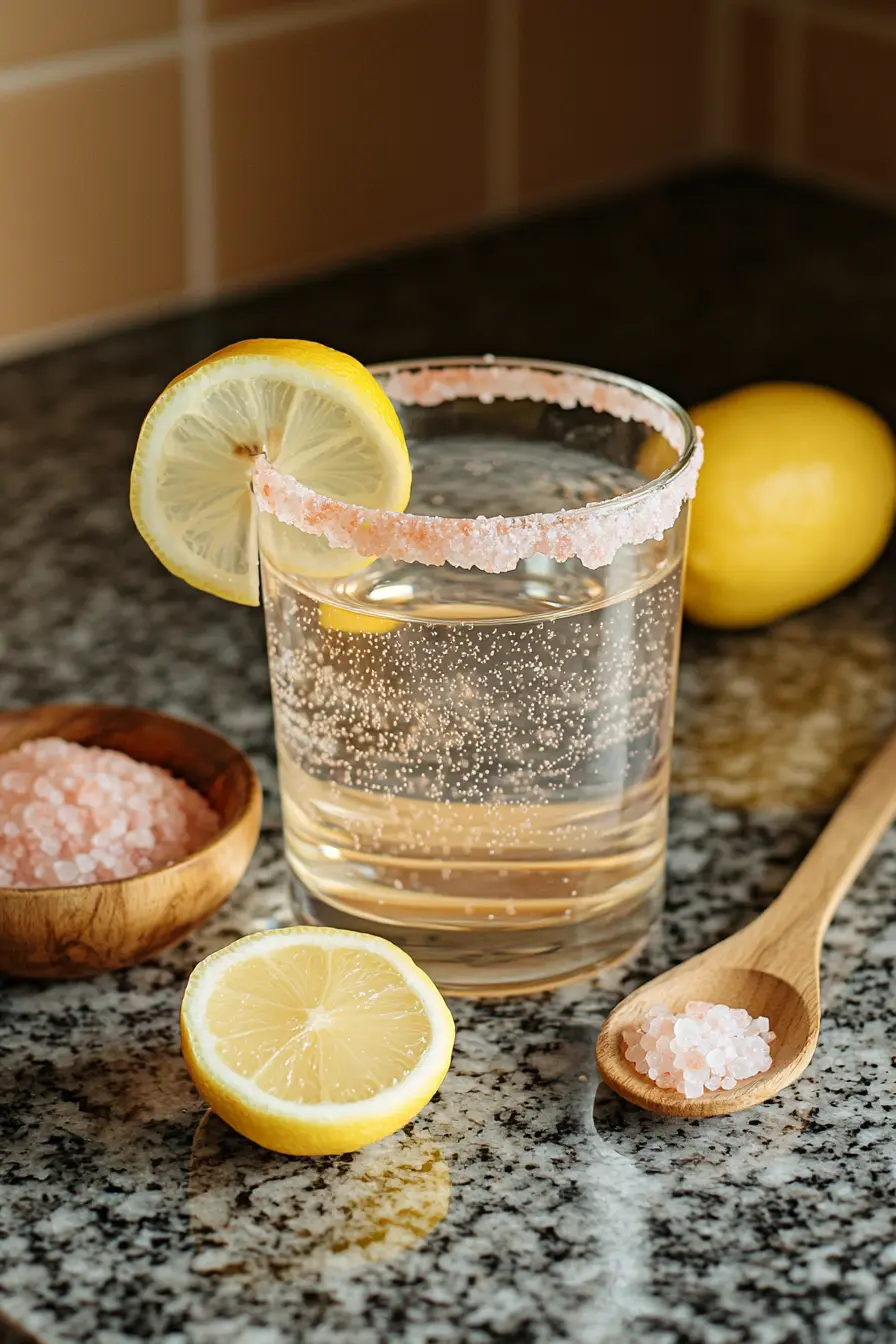
What Ingredients Do You Need for the Himalayan Salt Flush Drink?
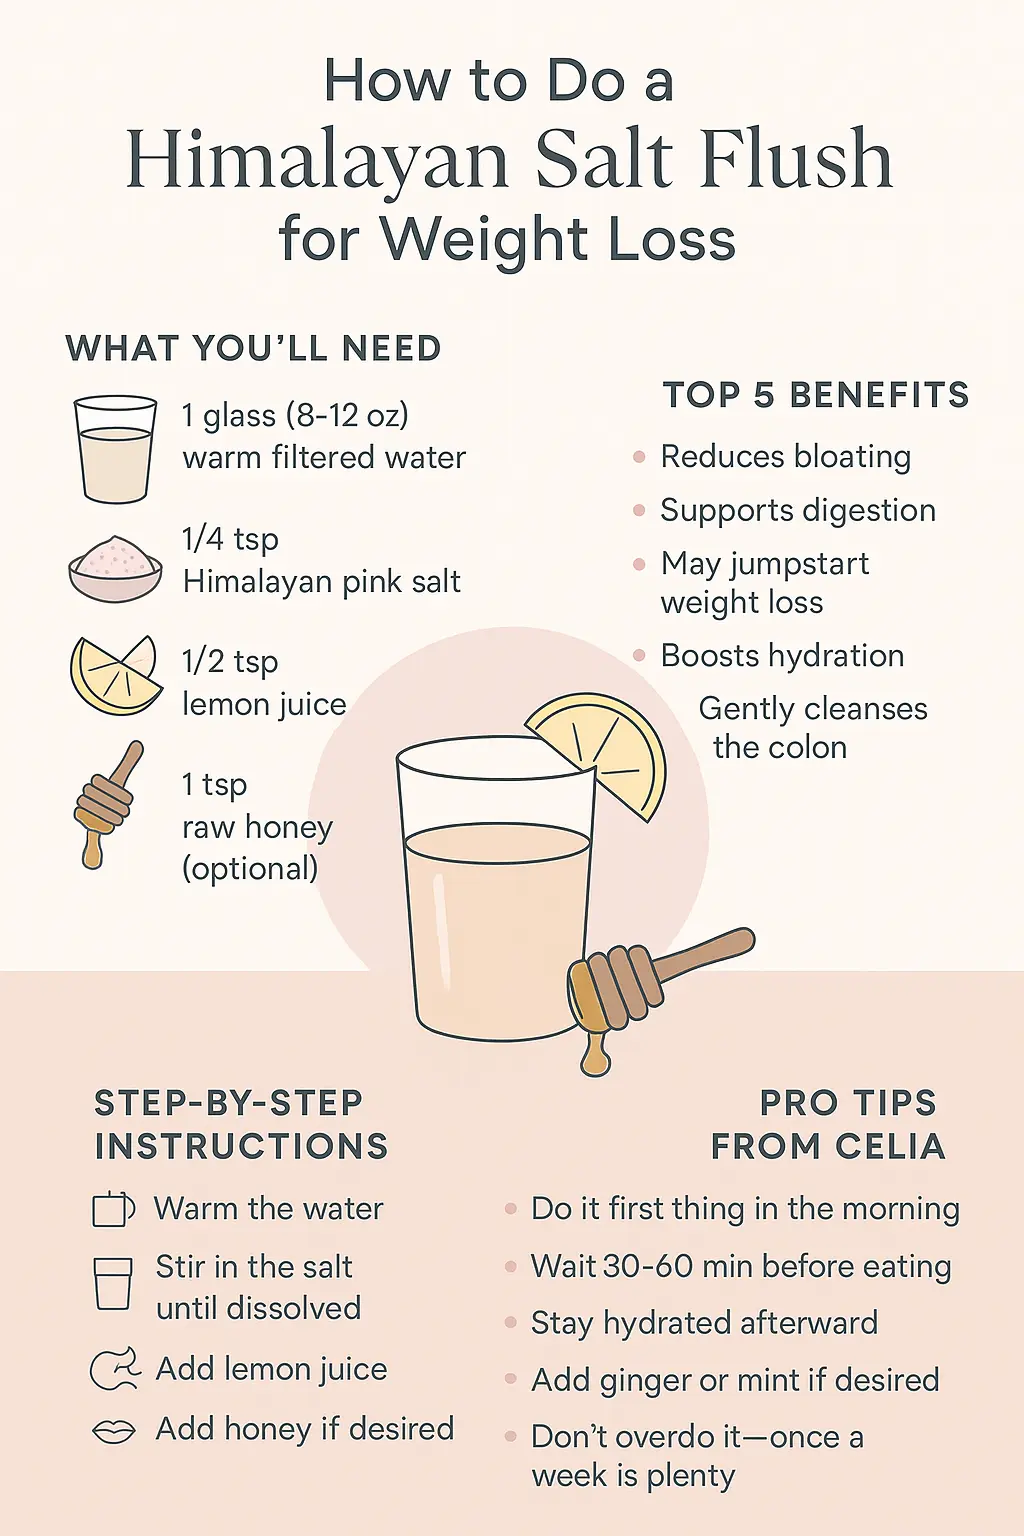
Here’s what you’ll need to prepare this morning salt flush that supports digestion and natural detox:
How Do You Make the Himalayan Salt Flush for Weight Loss?
Follow these steps to prepare and enjoy your detox salt flush properly:
Warm water helps dissolve the salt and is gentler on your stomach.
This salt helps stimulate digestion and gently cleanse your system.
Lemon adds vitamin C and gives the drink a refreshing kick.
This softens the saltiness and adds a hint of natural sweetness.
Sip slowly and give yourself about an hour to let it work.
This gentle blend helps support digestion, flush out toxins, and set a healthy tone for the rest of your day.nything before doing the flush, and give your body time to process before your first meal.
What Tips Would I Give a Friend About the Salt Flush?
If we were sitting across from each other in my kitchen maybe you with a tea, me barefoot and still in leggings I’d tell you what I’ve learned by actually living with this salt flush.
Not from reading about it, but from making it a small part of my life between school drop-offs, recipe testing, and yes, forgetting the dog at the groomer.
Here’s the real stuff that’s helped me:
What I’ve Found Actually Works
Little Things That Make It Better
This isn’t about being perfect. Some weeks I do the flush, some weeks I don’t. It’s not a rule it’s just one more way I take care of myself when I can.
How Do I Personally Prepare for a Salt Flush and What Comes After?
Over time, I’ve learned that when and how you do a Himalayan salt flush matters.
Here’s how I fit it into my real, busy life as a mom, chef, and wellness lover.
🌙 The Night Before
I eat something light and plant-based nothing heavy or greasy.
Think warm soups or roasted veggies to make the flush smoother.
| Meal Ideas | Why It Works |
|---|---|
| Steamed veggies | Easy to digest and won’t weigh you down |
| Bone broth | Gentle on the stomach, nourishing |
| Quinoa salad | Light, filling, and packed with fiber |
I also make sure I’m hydrated, sipping water throughout the evening.
☀️ The Morning Of
I prepare the drink right after I wake up, before anything else.
No distractions, just quiet and a warm glass in my hands.
My quick morning steps:
- Make the drink and sip slowly
- Avoid multitasking give it your full attention
- Stay close to the restroom for about 1 hour
💧 After the Flush
I follow the flush with hydration usually lemon water or herbal tea.
Then I wait 30–60 minutes before eating.
Post-flush meal tips:
- ✅ Light breakfast (eggs, smoothie, fruit)
- ❌ Avoid caffeine or heavy fats
- ✅ Listen to your hunger not the clock
| Post-Flush Ideas | Why It Helps |
|---|---|
| Green smoothie | Restores nutrients and easy to digest |
| Soft eggs + greens | Light protein and fiber combo |
| Herbal teas | Rehydrates and calms digestion |
Doing it this way keeps my body happy, light, and balanced.
Full Recipe Card: Pink Salt Weight Loss Drink
Pink Salt Weight Loss Drink
Ingredients
Instructions
- Pour warm water into a glass.
- Add Himalayan pink salt and stir until fully dissolved.
- Squeeze in fresh lemon juice.
- Stir in raw honey if using.
- Sip slowly on an empty stomach for maximum benefits.