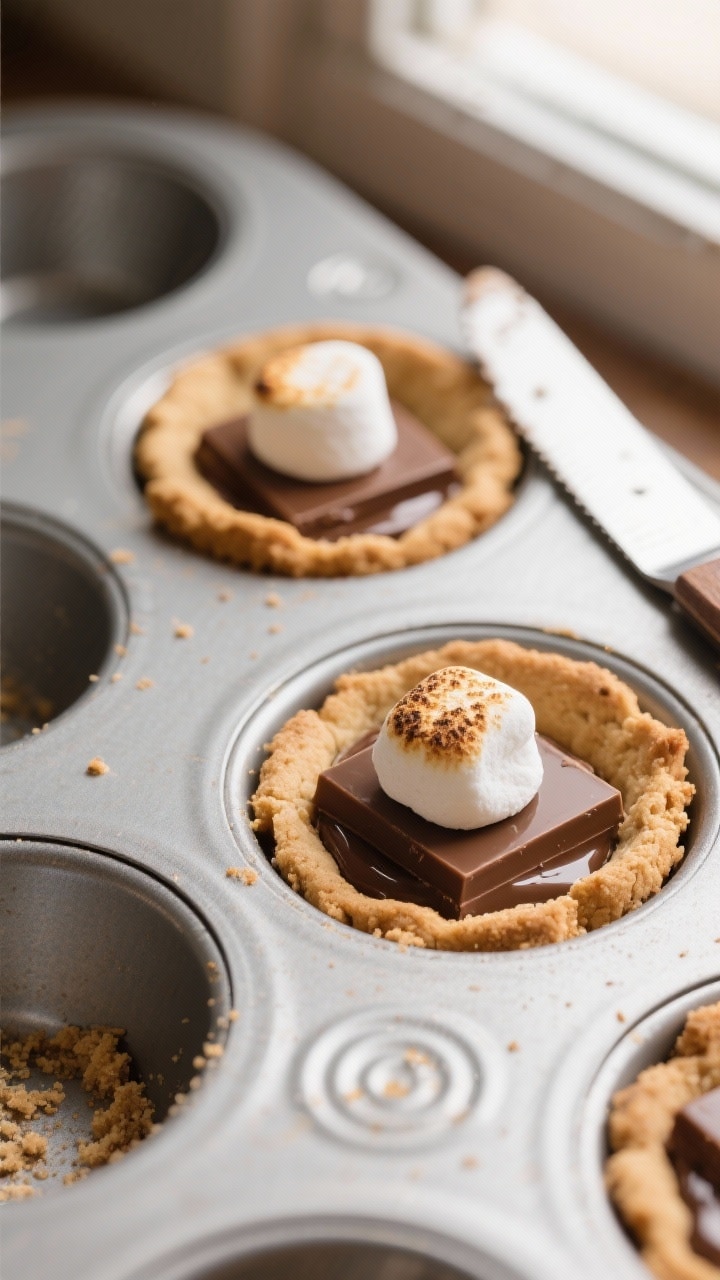
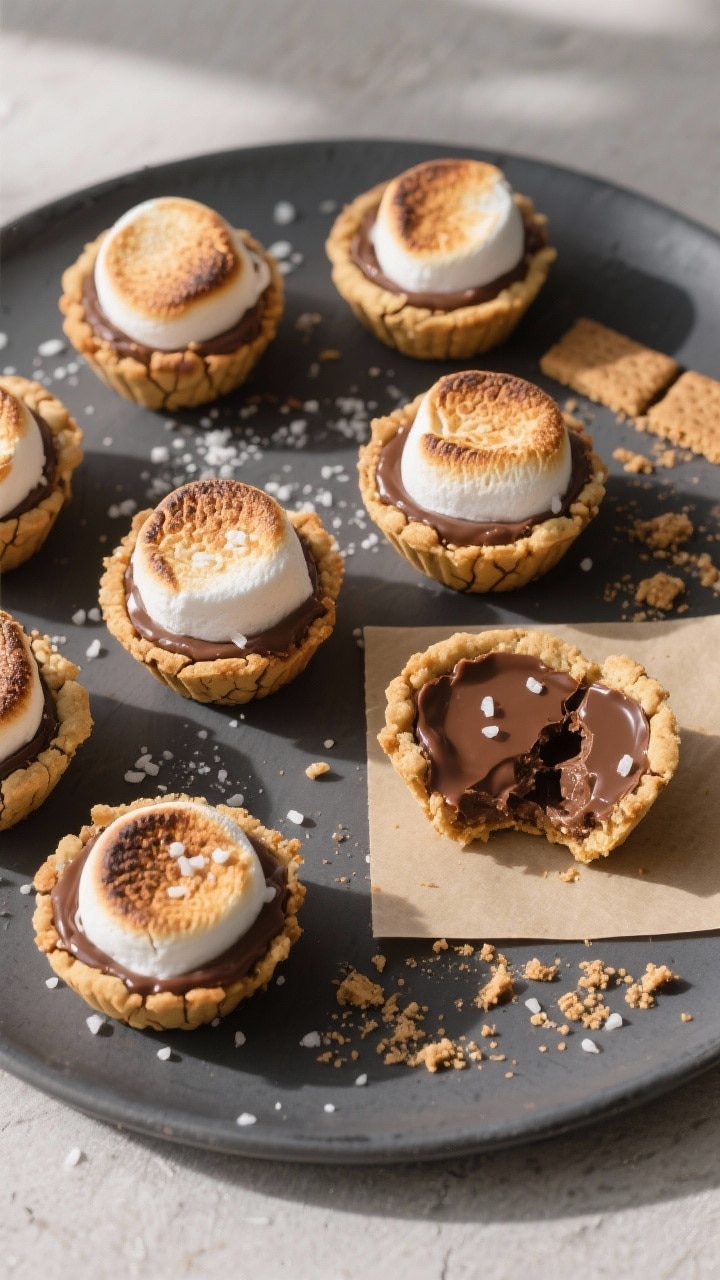
Smores cookie cups bring the campfire favorite straight to your kitchen, no skewers required. You get a soft, buttery cookie base, melty chocolate, and a toasted marshmallow—all in one bite. They look impressive, but they’re simple enough for a weeknight treat.
Whether you’re baking with kids or prepping dessert for a party, these cookie cups deliver the fun and the flavor. Expect a little gooey, a little crunchy, and a whole lot of cozy nostalgia.
Table of Contents
Why This Recipe Works
- Classic flavors, smarter format: You get the graham, chocolate, and marshmallow combo in a sturdy, handheld cookie cup that doesn’t fall apart.
- Uses a muffin tin: The wells create a perfect “cup” for the chocolate and marshmallow to nestle into, preventing mess and keeping everything gooey.
- Brown sugar base: A touch of brown sugar gives the cookie dough a chewy, caramelized flavor that pairs beautifully with the marshmallow.
- Simple ingredients: Everything is pantry-friendly, and you can use store-bought chocolate squares for fuss-free assembly.
- Customizable: Swap in different chocolate, add peanut butter, or use mini marshmallows—this recipe is flexible.
Ingredients
- 1 1/2 cups graham cracker crumbs (about 10–12 full sheets)
- 1 cup all-purpose flour
- 1/2 teaspoon baking soda
- 1/4 teaspoon baking powder
- 1/2 teaspoon fine sea salt
- 1/2 cup unsalted butter, softened
- 1/2 cup granulated sugar
- 1/2 cup light brown sugar, packed
- 1 large egg, room temperature
- 1 teaspoon vanilla extract
- 12–18 chocolate squares (milk or dark, such as Hershey’s)
- 12 large marshmallows (or 36 mini marshmallows)
- Nonstick baking spray or softened butter for greasing the muffin tin
- Optional: 1/4 teaspoon ground cinnamon for the dough
Step-by-Step Instructions
- Preheat and prep: Heat your oven to 350°F (175°C). Lightly grease a standard 12-cup muffin tin with nonstick spray or butter.
- Make graham crumbs: Pulse graham crackers in a food processor until fine.
Measure out 1 1/2 cups. If you don’t have a processor, seal them in a bag and crush with a rolling pin.
- Combine dry ingredients: In a bowl, whisk graham crumbs, flour, baking soda, baking powder, salt, and optional cinnamon until evenly mixed.
- Cream butter and sugars: In a separate bowl, beat softened butter with granulated and brown sugars until light and fluffy, about 2 minutes.
- Add egg and vanilla: Mix in the egg and vanilla until smooth. Scrape the bowl to ensure everything is combined.
- Form the dough: Add the dry mixture to the wet ingredients.
Stir just until the dough comes together. It should be thick and slightly crumbly but hold when pressed.
- Portion into cups: Divide the dough among the muffin wells, about 2 tablespoons per cup. Press the dough firmly into the bottom and slightly up the sides to create shallow wells.
- Pre-bake the cookie cups: Bake for 8–10 minutes, until the edges look set and lightly golden.
The centers will still look soft—that’s perfect.
- Add chocolate: Remove the tin from the oven. Press one chocolate square into the center of each cup while the cookie base is hot.
- Add marshmallows: Place one large marshmallow (or three minis) on top of each chocolate square. Gently press so it sticks.
- Finish baking: Return the tin to the oven and bake 2–4 more minutes, until the marshmallows are puffy and starting to toast.
For a deeper toast, broil on high for 20–40 seconds. Watch closely to prevent burning.
- Cool and release: Let the cookie cups cool in the pan for 10 minutes. Run a thin knife around the edges, then lift them out and transfer to a rack.
They will firm up as they cool.
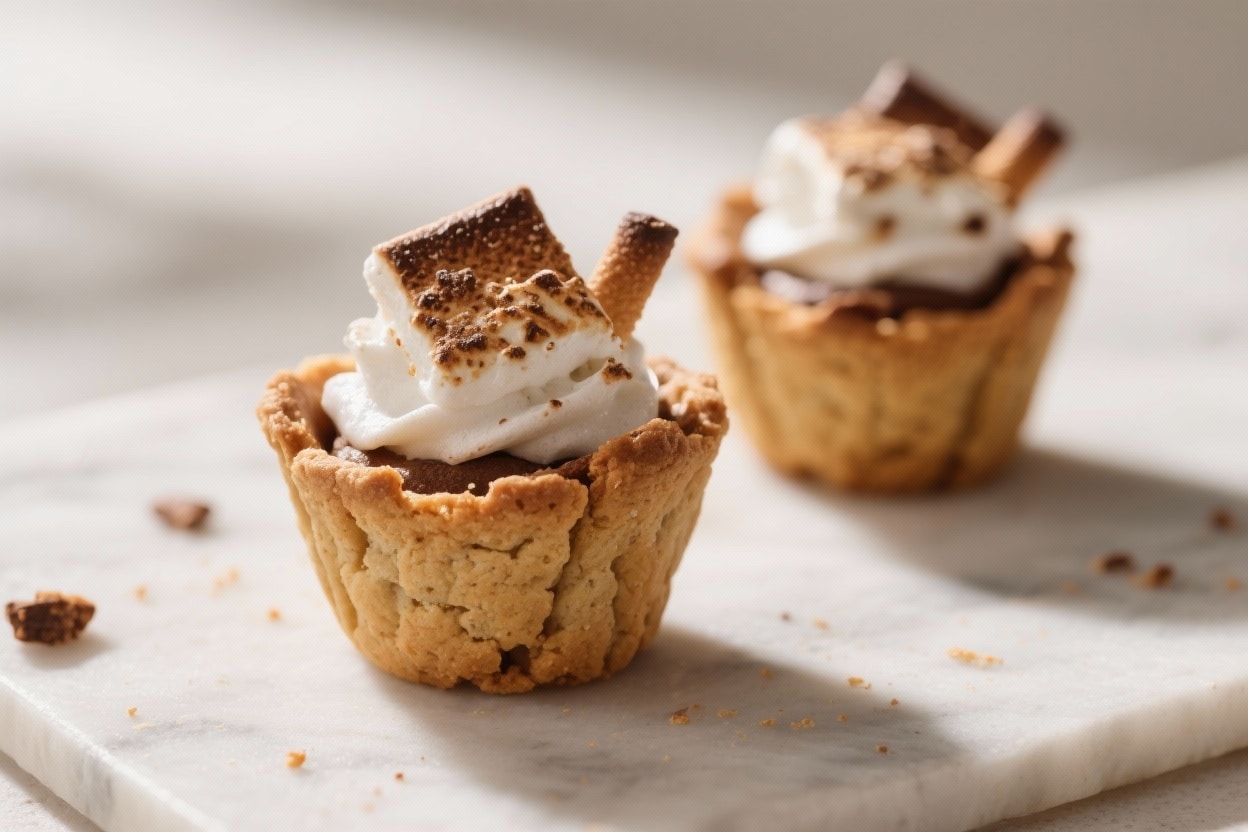
- Serve: Enjoy warm for extra gooey centers, or at room temperature for tidier bites.
Storage Instructions
- Room temperature: Store in an airtight container for up to 2 days. Separate layers with parchment to prevent sticking.
- Refrigerator: Keeps well for 4–5 days. Let them come to room temp before serving or warm in the microwave for 8–10 seconds.
- Freezer: Freeze for up to 2 months.
Wrap each cup individually in plastic, then place in a freezer bag. Thaw overnight in the fridge or at room temp for 1–2 hours.
- Reheating tip: To revive the gooey center, warm in a 300°F (150°C) oven for 5–7 minutes.
Benefits of This Recipe
- No campfire needed: All the nostalgia and flavor, without smoke or sticky fingers.
- Kid-friendly and crowd-pleasing: Easy steps and familiar ingredients make this a safe win for parties and bake sales.
- Make-ahead friendly: Dough can be made in advance, and the cups freeze well.
- Flexible flavors: You can tailor the chocolate and add-ins to your taste, from dark chocolate to peanut butter cups.
- Neat and portable: The muffin shape keeps everything contained, so they’re easy to pack and share.
Common Mistakes to Avoid
- Skipping the pre-bake: If you don’t bake the cups before adding the chocolate and marshmallow, the centers can stay raw and collapse.
- Overbaking: The cookie base should be just set after the first bake. Overbaking leads to dry, crumbly cups.
- Forgetting to grease the pan: These can stick.
Grease well, and run a thin knife around the edges after cooling slightly.
- Too much dough per cup: Overfilling leads to domed tops and less room for the chocolate and marshmallow. Aim for about 2 tablespoons of dough.
- Broiler mishaps: Marshmallows brown fast. If you broil, don’t walk away—20 seconds can make or break them.
Alternatives
- Chocolate swaps: Use dark chocolate, caramel-filled squares, peanut butter cups, or a spoonful of Nutella.
- Marshmallow variations: Mini marshmallows melt easily and toast evenly.
Marshmallow creme works, but add it after baking to avoid melting mess.
- Gluten-free option: Use certified gluten-free graham crackers and a 1:1 gluten-free flour blend.
- Dairy-free option: Use plant-based butter and dairy-free chocolate. Check marshmallows for gelatin-free versions if needed.
- Add-ins: Mix 1/3 cup mini chocolate chips into the dough for extra chocolate pockets, or add a pinch of flaky sea salt on top before serving.
FAQ
Can I use store-bought cookie dough?
Yes. Sugar cookie or chocolate chip cookie dough both work.
Press about 1 1/2 tablespoons into each greased muffin well, pre-bake until just set, then add chocolate and marshmallow and finish baking.
How do I keep the marshmallows from getting too hard?
Don’t overbake after adding the marshmallows. Bake just until puffed, then remove. If they firm up over time, a short reheat in the oven or microwave will soften them again.
What if I don’t have a muffin tin?
Use a mini muffin tin for bite-size cups (reduce the initial bake to 6–7 minutes), or bake as bars in an 8×8-inch pan.
Press the dough in, bake until set, then top with chocolate and marshmallows and return to the oven to toast.
Can I make the dough ahead of time?
Absolutely. Refrigerate the dough for up to 48 hours or freeze up to 2 months. Let chilled dough sit at room temperature for 15–20 minutes so it’s easy to press into the pan.
How do I get cleaner edges when removing them from the pan?
Let the cups cool for 10 minutes in the tin to set, then run a thin offset spatula or butter knife around the edges.
If they’re still delicate, cool a few more minutes before lifting out.
Why did my cups sink in the middle?
They may have been underbaked during the first bake, or the dough-to-cup ratio was too heavy in the center. Make sure to press the dough slightly up the sides to create a shallow well.
Can I add peanut butter?
Yes. Spread 1 teaspoon of peanut butter over the chocolate square before adding the marshmallow, or swap the chocolate for a mini peanut butter cup.
In Conclusion
Smores cookie cups pack everything you love about the classic campfire treat into a warm, handheld dessert.
They’re simple, adaptable, and always a hit. With a few pantry staples and a muffin tin, you can bake a batch that tastes nostalgic yet looks party-ready. Keep this recipe on hand for birthdays, bake sales, or any night you want something sweet, gooey, and guaranteed to make people smile.
Ingredients
Instructions
- Preheat and prep: Heat your oven to 350°F (175°C). Lightly grease a standard 12-cup muffin tin with nonstick spray or butter.
- Make graham crumbs: Pulse graham crackers in a food processor until fine. Measure out 1 1/2 cups. If you don’t have a processor, seal them in a bag and crush with a rolling pin.
- Combine dry ingredients: In a bowl, whisk graham crumbs, flour, baking soda, baking powder, salt, and optional cinnamon until evenly mixed.
- Cream butter and sugars: In a separate bowl, beat softened butter with granulated and brown sugars until light and fluffy, about 2 minutes.
- Add egg and vanilla: Mix in the egg and vanilla until smooth. Scrape the bowl to ensure everything is combined.
- Form the dough: Add the dry mixture to the wet ingredients. Stir just until the dough comes together. It should be thick and slightly crumbly but hold when pressed.
- Portion into cups: Divide the dough among the muffin wells, about 2 tablespoons per cup. Press the dough firmly into the bottom and slightly up the sides to create shallow wells.
- Pre-bake the cookie cups: Bake for 8–10 minutes, until the edges look set and lightly golden. The centers will still look soft—that’s perfect.
- Add chocolate: Remove the tin from the oven. Press one chocolate square into the center of each cup while the cookie base is hot.
- Add marshmallows: Place one large marshmallow (or three minis) on top of each chocolate square. Gently press so it sticks.
- Finish baking: Return the tin to the oven and bake 2–4 more minutes, until the marshmallows are puffy and starting to toast. For a deeper toast, broil on high for 20–40 seconds. Watch closely to prevent burning.
- Cool and release: Let the cookie cups cool in the pan for 10 minutes. Run a thin knife around the edges, then lift them out and transfer to a rack. They will firm up as they cool.
- Serve: Enjoy warm for extra gooey centers, or at room temperature for tidier bites.